Installing AMD drivers with Device manager
Occasionally it may be required that you install a driver manually with Device Manager. This article does not apply to AMD workstation graphics. This page describes instructions that can be taken to do so, although it is recommended that you use Windows Update or the AMD driver update utility to find the latest drivers for your computer unless a conflict occurs requiring you to do so manually.
Applications
Installing drivers via Device manager differs from automatic installation in a number of ways:
- On OEM devices, an OEM may sometimes use custom drivers that block the installation of generic AMD drivers. Installing with Device manager avoids this issue, although it generally is recommended to use OEM drivers on these devices whenever possible.
- On the Windows 10 Insider Preview, due to a limitation of Windows Update capabilities, “beta” drivers must be marked as “WHQL’ed.” Because the Insider Preview exists to preview demo releases, drivers will be marked as “WHQL’ed” albeit not actually having been screened. The AMD driver installers will occasionally not work due to Windows reporting a newer WHQL’ed driver being available.
- On some older AMD/ATI graphics cards, the error “LoadLibrary: Error 126” can be resolved by deleting AMD driver software with Device manager or using file system workarounds. Read more.
Prerequesites
NOTE: This article assumes that you already have a driver and are looking to install it with Device manager. If you have not found a device driver to install, refer to this page and use the “manual” links to obtain a driver. If you were directed to this page by someone else, ask them for an appropriate driver or use one of the support resources to request one.
If you are not on Windows, please continue to the community support resources
Ensure that the driver you are attempting to install uses a Windows Display Driver Model (WDDM) version that is compatible with your operating system. This ensures that the driver you are going to be installing will actually work on your computer.
If the driver is compatible, you can continue to manually installing the driver.
Installing
Removing your current graphics drivers
Although it is not required, it is recommended that you remove your current drivers before you manually install new ones. This is to avoid Windows’ versioning mechanics that dictate whether a driver can be installed or not based on which is the “newer” driver.
Right click the start button or use the keyboard shortcut Win + X to get a power menu. Select “Device manager” and look for the “Display Adapter” section. Expand the section and you should see an entry containing “AMD” in it, which should be your graphics card.
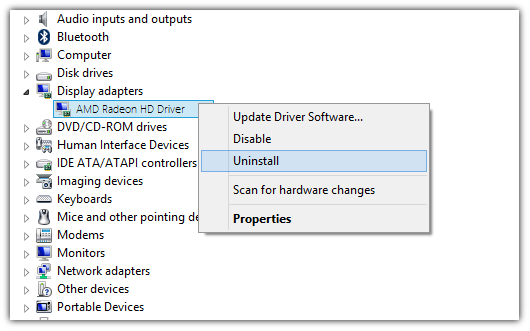
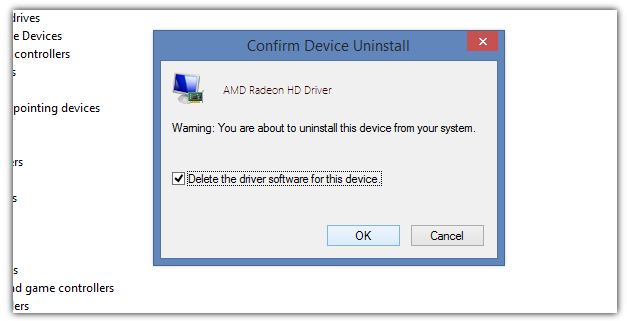
Close any other applications that may be depending on your graphics card. Then go back to Device manager and right click the new entry that appeared and choose “Uninstall,” this will uninstall the graphics driver currently in use. Ensure that the “Delete the driver software for this device” option is enabled.
Installing the new drivers
Run the AMD driver installer and you should get an option to extract the files to a destination. Choose anywhere you wish, but keep this location in mind. Once the files have been extracted, the installer will try to install the driver. If it works, you can stop reading here, if not you can continue.
Go back to Device manager and expand the “AMD” device that should be under the “Display Adapters” as before. Right click it and choose “Update Driver Software…” and then “Browse my computer for driver software.” You should get another menu, do not press “Browse” and instead press “Let me pick from a list of device drivers on my computer.” At the bottom right, select “Have Disk…” and then “Browse…” – go to the folder which you extracted the AMD drivers to.
You should see the folder “Packages,” open it. Then browse to “Drivers,” “Display.” You may a list of folders with “_INF” at the end of their names. The folder with the larger name is the 64-bit driver and the file with the shorter name is the 32-bit driver. Depending on your OS architecture, open the folder that relates to what you have (if you only see one folder, use that one). Then you should get a list of files, look for the first one that has an “.inf” extension and select it. Then back at the prompt select “OK” and the driver should install on your computer.
If the driver still does not install, your operating system may not be compatible with the driver and thus Windows will still refuse to load the driver. In this case you should run Windows Update to get whatever driver is currently available for your computer.
For reference, this video demonstrates the install process. Note that certain parts of the video may differ from what it looks like on your PC, although the concept is the same.